28+ Shoulder-Length Haircuts With Layers That’ll Transform Your Look in 2026
Let’s be honest – there’s something magical about shoulder-length hair. It’s not too short, not too long, and when you add layers? Game changer.
I’ve spent years watching women transform their look with the right shoulder length haircuts with layers, and I can tell you this: it’s one of the most versatile lengths you can rock. Whether you’ve got thick hair that needs taming or fine strands begging for volume, layers are your best friend.
Now here’s where it gets interesting. Not all layered haircuts are created equal. The difference between “meh” and “wow” comes down to understanding your hair type, face shape, and lifestyle. And that’s exactly what we’re diving into today.
In this guide, you’ll discover 50+ shoulder-length haircuts with layers that actually work in real life (not just in magazines). Plus, I’ll share insider tips on maintenance, styling, and how to talk to your stylist so you actually get the cut you want. You might be wondering if layers will work for your specific hair type – spoiler alert: they absolutely can, you just need to know which style to choose.
Ready to find your perfect cut? Let’s go.
If you’ve ever wondered why layered cuts look so light and bouncy, understanding
how hair layers create movement can completely change the way you see this haircut.
Why Shoulder-Length Haircuts With Layers Never Go Out of Style
There’s a reason shoulder-length haircuts with layers have been a salon staple for decades. They’re the perfect middle ground that gives you enough length to play with different styles, but not so much that you’re dealing with heavy, unmanageable hair.
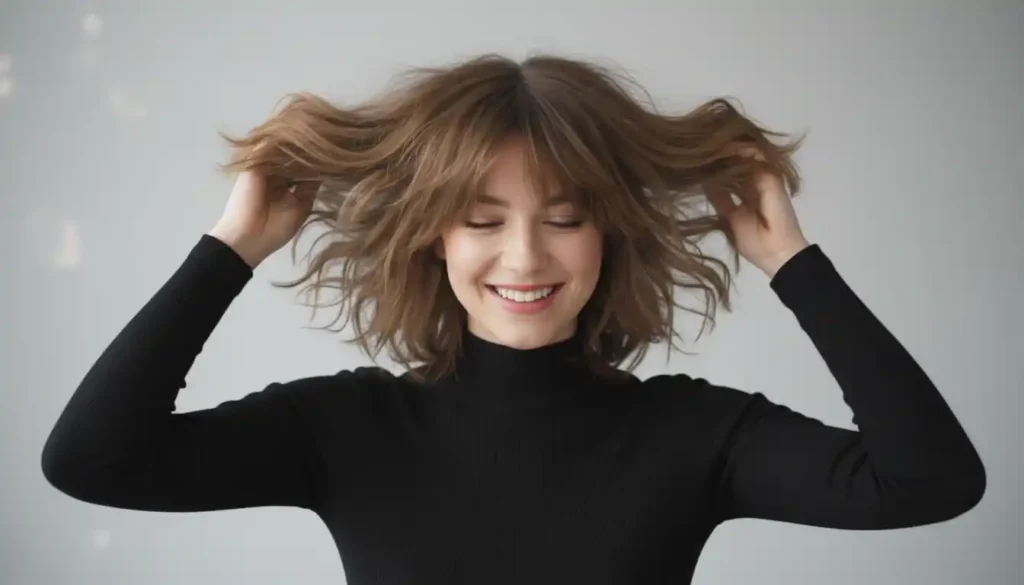
What I love about this length is its incredible versatility. You can throw your layered hair into a messy bun on Monday, wear it sleek and straight for a Tuesday meeting, and add some tousled waves for Friday night drinks. The layers add movement and dimension that makes every style look intentional, even when you literally just rolled out of bed.
And let’s talk about the practical side. Shoulder-length hair doesn’t get caught in your coat zipper, won’t give you neck sweat in summer, and actually stays put when you want it to. Add layers into the mix, and you’re solving common problems like lack of volume, too much bulk, or that dreaded triangle shape that happens with one-length cuts. The right layered cut can literally take years off your appearance by framing your face and adding that youthful bounce we all want.
Understanding Different Types of Layers for Shoulder-Length Hair
Before we dive into specific styles, let’s break down the different types of layers you can get. Trust me, knowing these terms will make your next salon visit so much easier.
If you want a subtle, sophisticated look with your layers, see how gray blending for dark hair can transform your style.
Long Layers
Long layers are subtle and start below your chin, creating gentle movement without drastically changing your overall length. Think of them as the “soft intro” to the layered world. They’re perfect if you want dimension and flow but aren’t ready to commit to a dramatically layered look.
Best for: Women with thick or heavy hair who want to remove bulk without losing length. Also great for beginners to layers who want to test the waters.
Styling tip: Use a large barrel curling iron to enhance the natural flow of long layers. The subtle graduation will make waves look effortlessly polished.
Before trying new products, it’s helpful to learn how hair growth actually works so you can set realistic expectations.
Short Choppy Layers
Now we’re talking texture! Short choppy layers are cut at varying lengths throughout your hair, creating that piece-y, modern look you see all over Instagram. These layers start higher up (sometimes at ear level) and create maximum movement and volume.
Best for: Fine or thin hair that needs a serious volume boost. The choppy texture creates the illusion of fuller, thicker hair.
Styling tip: Apply a texturizing spray to damp hair before blow-drying with your fingers (not a brush) for that perfectly imperfect finish. A little dry shampoo at the roots adds extra lift.
Face-Framing Layers
These layers are strategically cut around your face to highlight your best features. They typically start around your cheekbones or jawline and blend seamlessly into the rest of your shoulder-length hair. It’s like having a built-in filter for your face.
Best for: Everyone, honestly. Face-framing layers are universally flattering and can be customized to complement any face shape.
Styling tip: Use a small round brush to blow-dry these pieces away from your face for a soft, flattering effect. You can also use a flat iron to add a gentle bend.
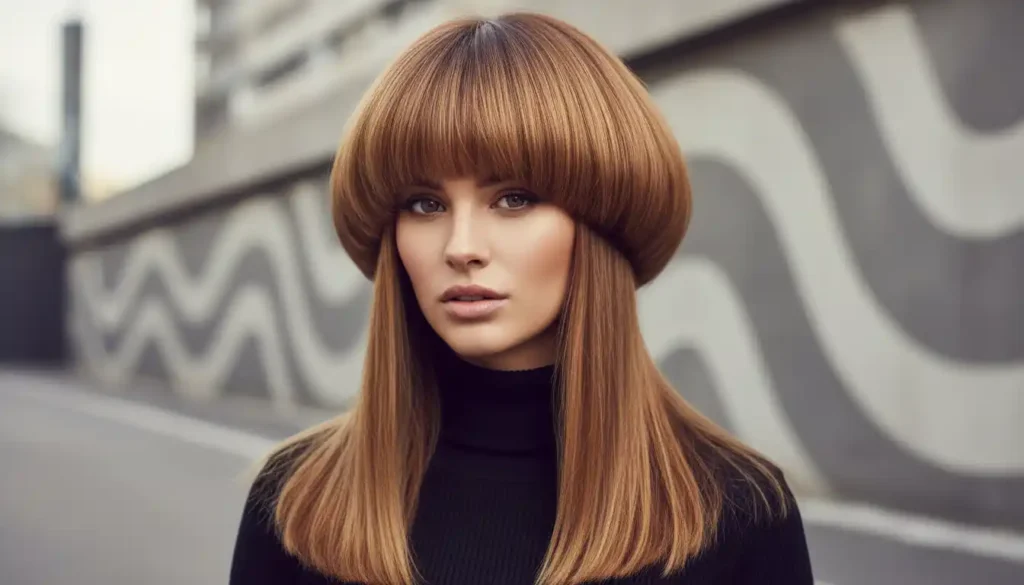
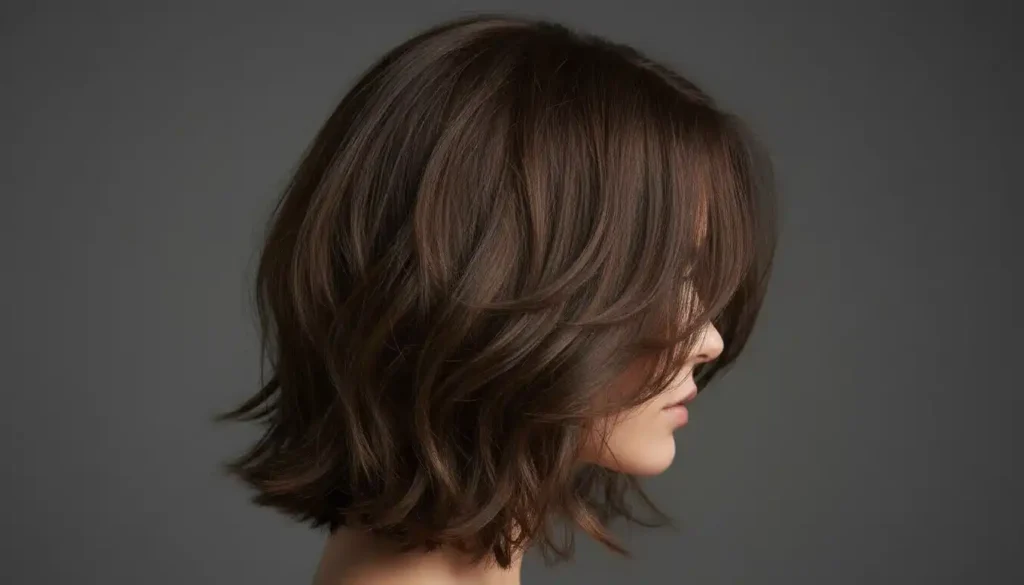
Feathered Layers
Feathered layers have that soft, wispy quality that creates an airy, lightweight feel. The ends are point-cut or razor-cut to create delicate, feather-like texture. This technique was huge in the ’70s and ’90s, and it’s having a major moment again.
Best for: Thick or coarse hair that tends to look heavy. The feathering technique removes weight while maintaining body.
Styling tip: Blow-dry with a round brush, rolling the brush away from your face at the ends. Finish with a lightweight shine serum to define the feathered pieces without weighing them down.
Textured Layers
Textured layers use cutting techniques like point-cutting, slide-cutting, or razoring to create varied lengths within each section. This creates depth and dimension that catches light beautifully. It’s the secret behind those “I woke up like this” hairstyles that actually take skill to achieve.
Best for: All hair types! Texturing can be adjusted based on your hair’s density. Fine hair gets subtle texturing, while thick hair can handle more aggressive techniques.
Styling tip: Embrace the natural texture. Apply a curl-enhancing cream to damp hair and let it air-dry, scrunching occasionally. The varied lengths will create natural-looking waves and movement.
Razored Layers
Instead of using scissors, your stylist uses a razor to create these layers, which results in softer, more blended transitions between lengths. Razoring creates ultra-soft edges and is perfect for that lived-in, effortless look.
Best for: Straight to wavy hair with medium density. Razoring can make very curly or very fine hair look frizzy, so proceed with caution.
Styling tip: These layers look gorgeous with a simple air-dry. Just scrunch in some sea salt spray and let your hair do its thing. The razored edges create natural movement without any heat styling.
How to Choose the Perfect Layered Cut for Your Face Shape
Your face shape is like your hairstyle blueprint. Get this right, and you’ll wonder why you ever struggled with finding “your cut.” Here’s the breakdown.
Oval Face Shape
Lucky you! Oval faces are considered the most versatile face shape because your face length and width are well-balanced. You can pull off pretty much any shoulder-length haircut with layers.
My recommendations:
- Long layers with curtain bangs create a soft, romantic look that enhances your natural symmetry
- Choppy textured layers add edge without overwhelming your balanced features
- Face-framing layers starting at your cheekbones draw attention to your eyes
Pro tip: Since you have the freedom to experiment, try different parting styles. A deep side part with layers can create drama, while a center part keeps things classic and balanced.
Round Face Shape
The goal here is to create length and angles that elongate your face. Layers are your secret weapon for adding vertical lines and avoiding that dreaded “moon face” effect.
My recommendations:
- Long layers that start below your chin create elongating vertical lines
- Face-framing layers with a side part add angles and draw the eye downward
- Avoid: Blunt cuts at chin-length or heavy layers that add width at your cheeks
Pro tip: Ask your stylist for layers that are slightly angled forward. This creates a slimming effect by framing your face in a V-shape rather than rounding it out.
Square Face Shape
With a strong jawline and forehead, you want layers that soften those angular features. The right cut can create the illusion of a more oval face shape.
My recommendations:
- Soft, wispy layers around your jawline soften strong angles
- Textured layers with lots of movement prevent your hair from sitting too close to your face
- Long side-swept bangs paired with layers break up the width of your forehead
Pro tip: Keep layers soft and blended rather than blunt or choppy. You want to create curves, not emphasize angles. A slight wave in your layered hair works beautifully to soften your look.
Heart Face Shape
With a wider forehead and narrow chin, you’ll want layers that add width at your jawline and reduce volume at your temples.
My recommendations:
- Layers that start at chin-level create width where you need it most
- Curtain bangs or wispy bangs minimize your forehead width
- Avoid: Too much volume at the crown, which exaggerates the heart shape
Pro tip: Ask for layers that flip outward slightly at the ends. This adds width at your jawline and balances your narrower chin. A little texture spray can help create this effect.
Long Face Shape
Your goal is to create width and avoid adding more length. Shoulder-length haircuts with layers are actually perfect for this because they stop at a width-creating point.
My recommendations:
- Blunt ends with subtle internal layers create horizontal lines that widen your face
- Side-swept bangs shorten the appearance of your face
- Layers with lots of volume at the sides add width
Pro tip: Avoid layers that are too long and stringy – they’ll make your face look even longer. Instead, opt for fuller, more horizontal layers that create width. Waves and curls are your best friends.
28+Stunning Shoulder-Length Haircuts With Layers
Now for the main event! Here are 50+ gorgeous shoulder-length haircuts with layers to inspire your next salon visit.
Classic Elegant Styles
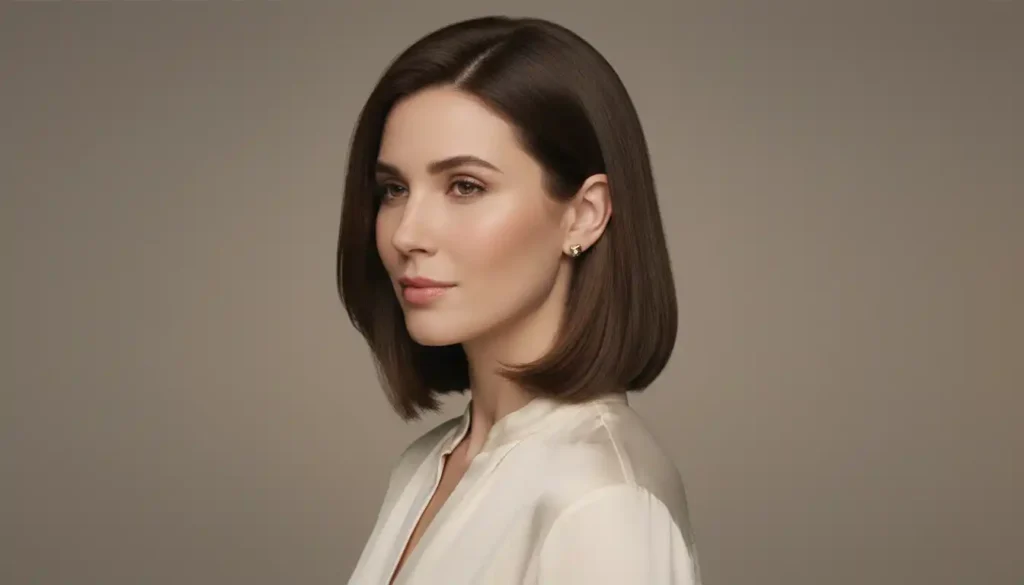
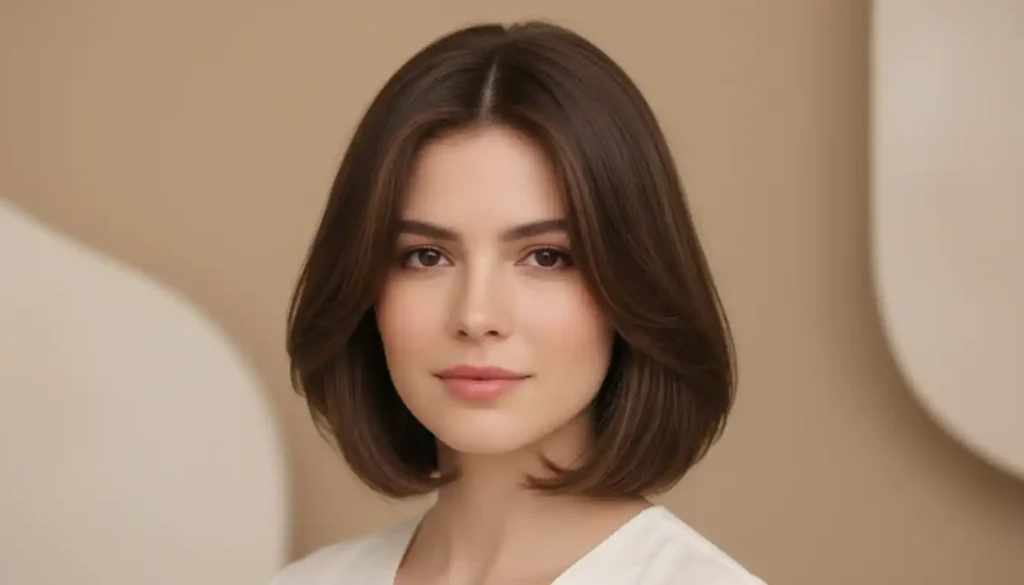
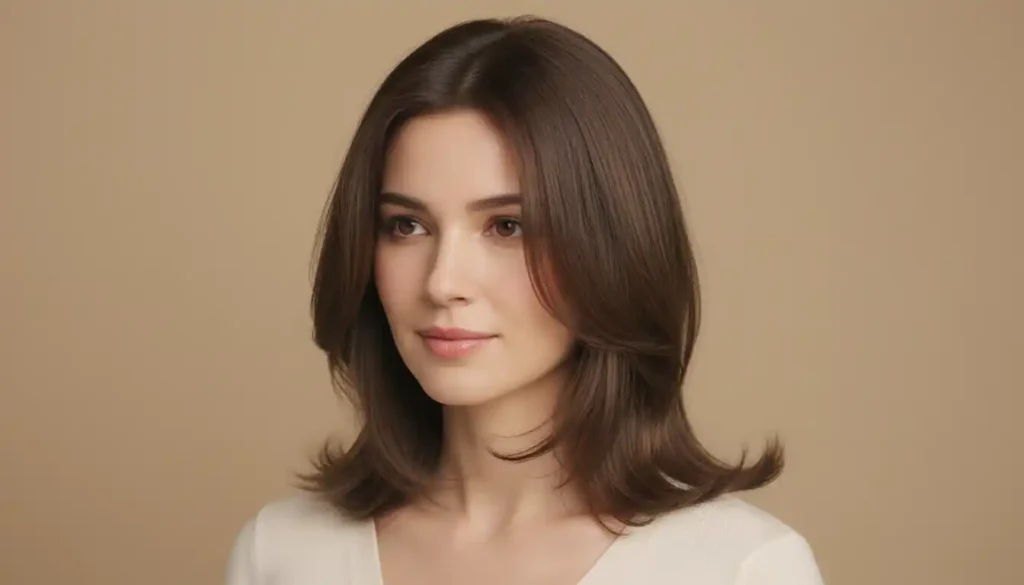
1. The Timeless Collarbone Bob with Soft Layers
This sophisticated shoulder-length haircut features subtle layers that start just below the chin, creating elegant movement without dramatic texture. Perfect for professional settings where you want to look polished but not stuffy. The layers add just enough dimension to keep straight hair from looking flat. Style with a paddle brush and a light shine serum for that boardroom-ready look.
2. The Grace Kelly Inspired Wave
Channel old Hollywood glamour with this layered cut featuring gentle layers and soft waves that frame your face beautifully. The layers are long and blended, creating that signature vintage volume at the crown. This works beautifully for women over 40 who want a timeless, age-appropriate style that still feels fresh and modern.
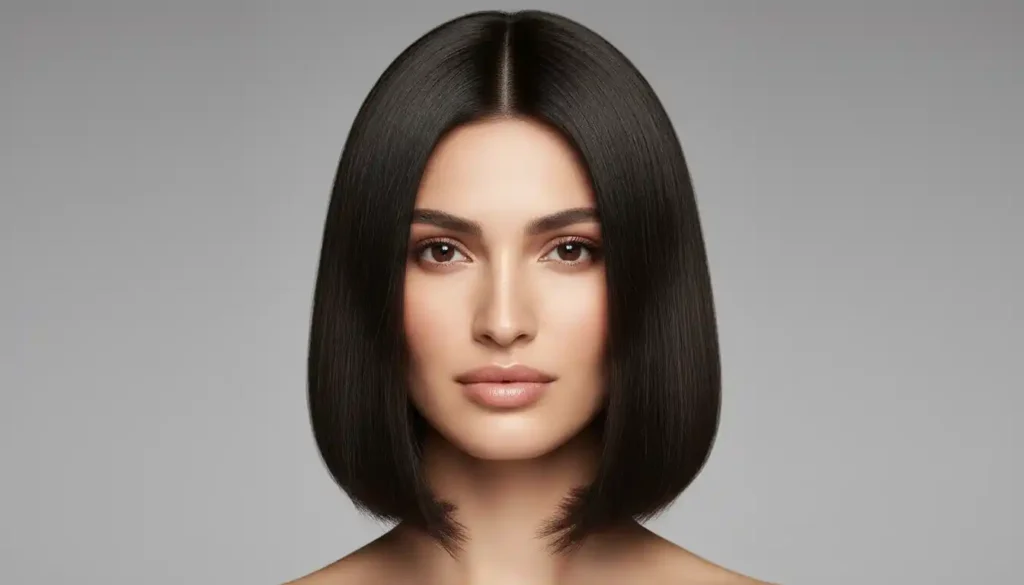
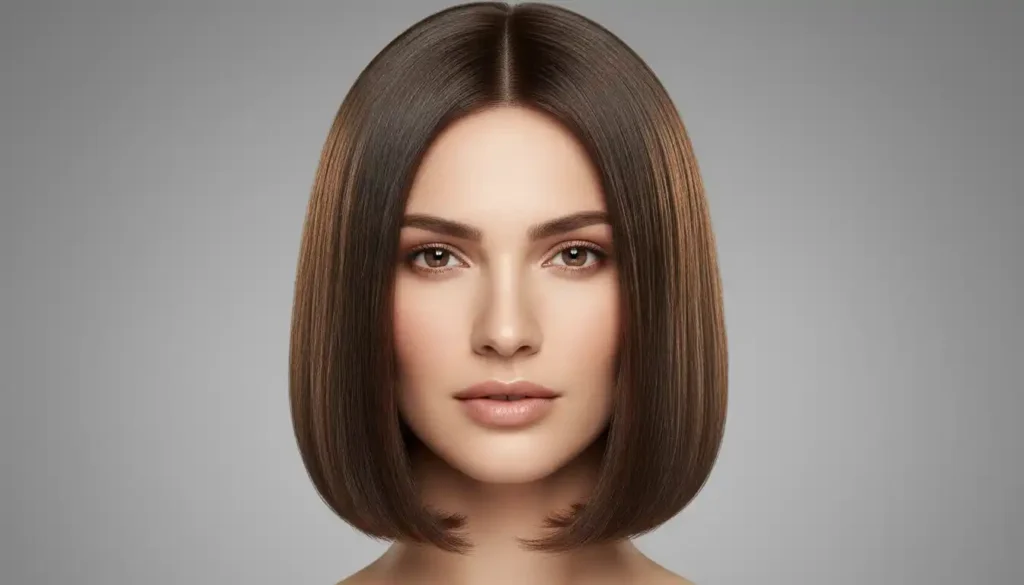
3. The Polished Professional
A sleek shoulder-length layered cut with minimal texture and maximum shine. The layers are subtle and designed to add body without creating too much movement – perfect if your workplace leans conservative. Flat iron smooth and finish with an anti-frizz serum for that polished, put-together appearance.
4. The Sophisticated Side Part
Deep side part meets soft face-framing layers in this elegant style. The asymmetry created by the side part is balanced by gentle layers that curve around your face. This cut is incredibly flattering for round faces as the side part and layers work together to create elongating angles.
5. The Classic Center Part with Long Layers
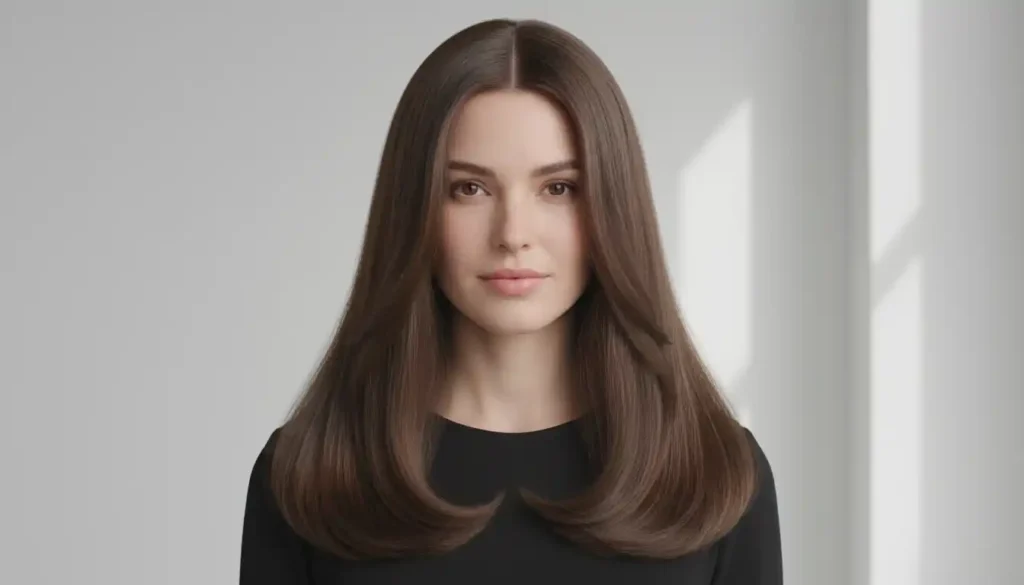
Simple, timeless, and universally flattering. A center part with long layers creates that effortlessly chic look that never goes out of style. The layers start below your collarbone and remove bulk without sacrificing the appearance of thick, healthy hair. Perfect for thick, straight hair that tends to look heavy.
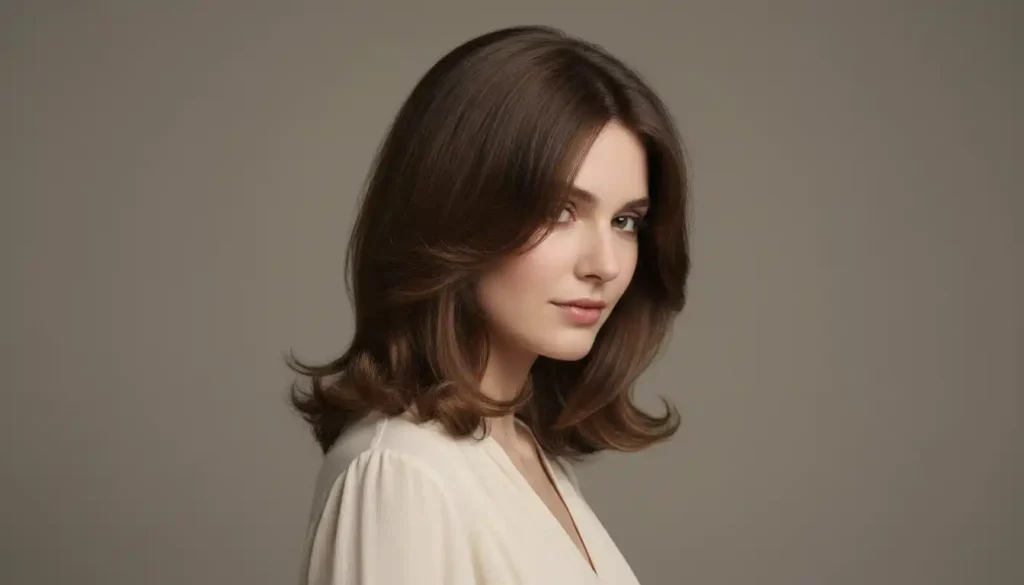
6. The Audrey Hepburn Bob
Inspired by classic cinema, this shoulder-length cut features subtle layers with a slight flip at the ends. It’s feminine, polished, and absolutely timeless. The soft layers create gentle movement while maintaining that iconic bob silhouette. Blow-dry with a round brush for that perfect vintage flip.
7. The Elegant Blowout Style
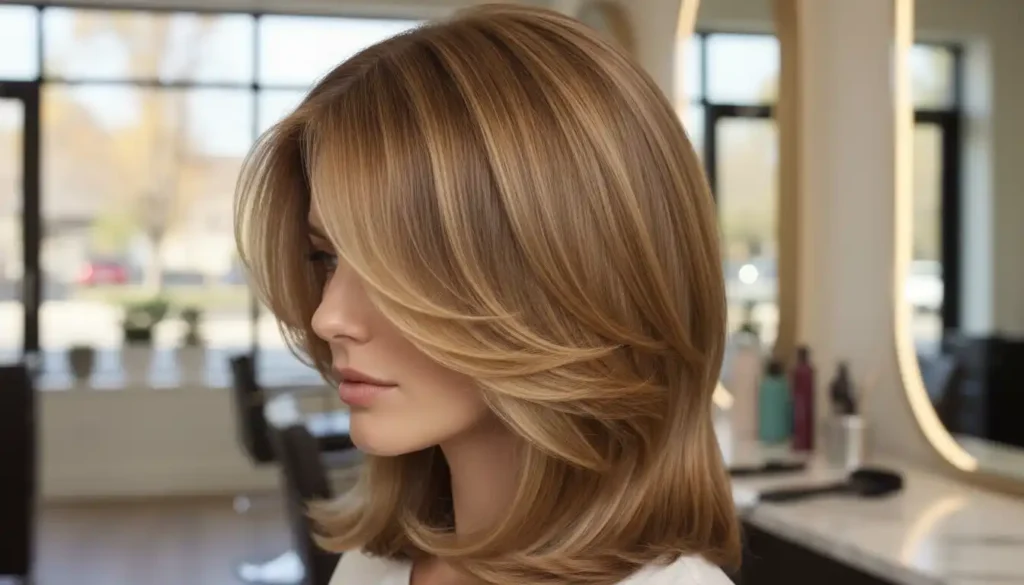
This layered haircut is cut specifically to look amazing when blow-dried with a round brush. The layers are strategically placed to create volume at the crown and movement throughout. It’s the style you get at the salon that you actually want to recreate at home. Invest in a good round brush and you’ll nail this look.
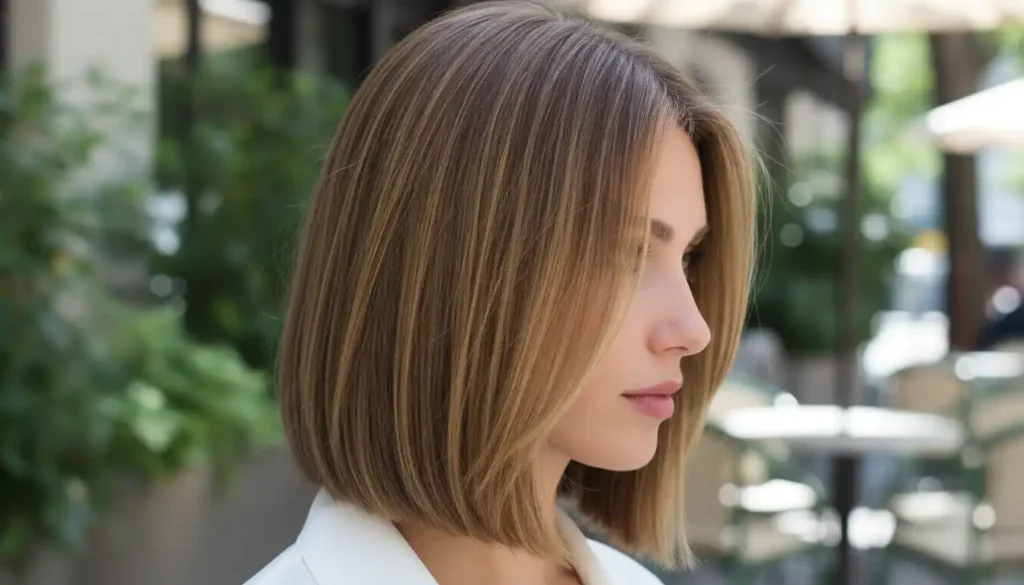
8. The Refined Straight Cut
Sleek, straight, and sophisticated with hidden layers that add body without obvious texture. The layers are blended so seamlessly that you get movement and volume without seeing where one layer ends and another begins. This is perfect for women who want their hair to look thick and healthy with a polished finish.
9. The Traditional Feathered Cut
Soft feathered layers create that classic, feminine look that’s been flattering women for decades. The layers are gently blended with feathered ends that create movement without heaviness. This cut works beautifully for women with naturally thick hair who want a lighter feel without losing fullness.
10. The Understated Elegance
Minimal layers concentrated at the ends create subtle movement in this refined shoulder-length cut. It’s the definition of “less is more” – just enough texture to prevent flatness, but nothing too dramatic. Perfect for women who want a small change without a major transformation. The subtle layers make even a simple ponytail look intentionally styled.
Modern Trendy Cuts
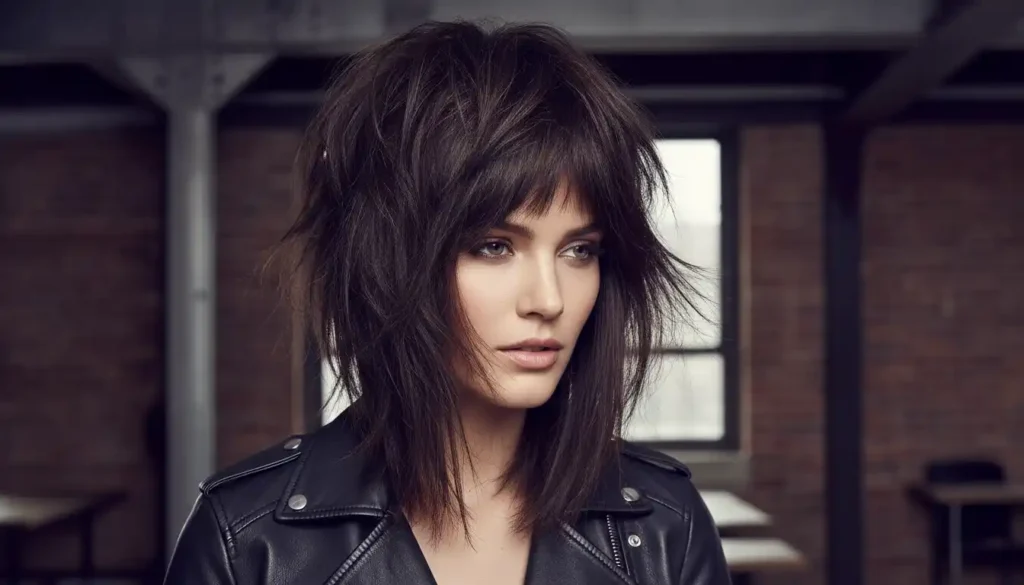
11. The Wolf Cut
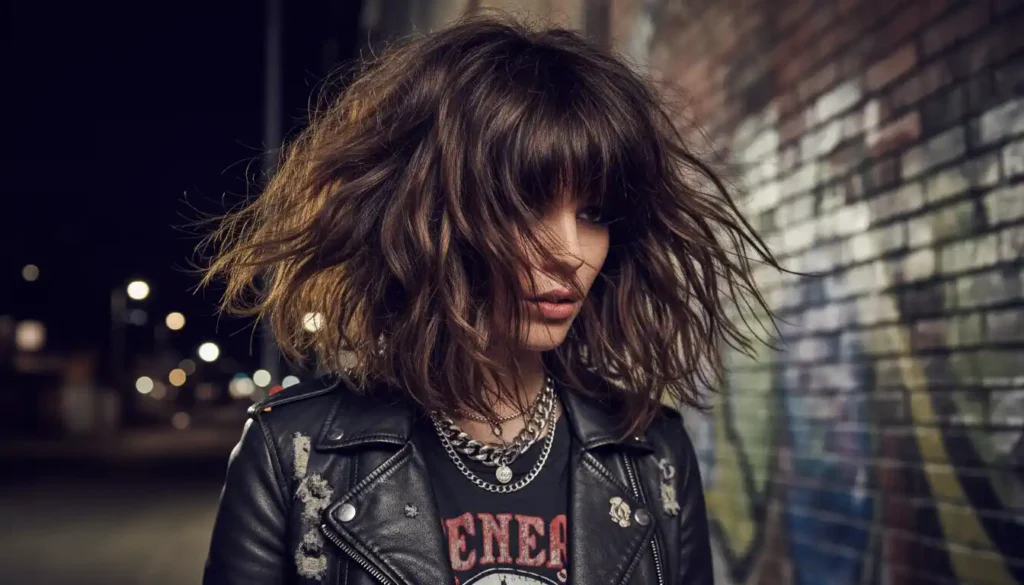
The edgiest of shoulder-length haircuts with layers, the wolf cut features short choppy layers on top creating dramatic volume, with longer layers at the bottom. It’s giving rockstar meets runway model. This cut requires confidence to pull off, but when you do? Absolutely stunning. Style with texturizing spray for that intentionally messy look.
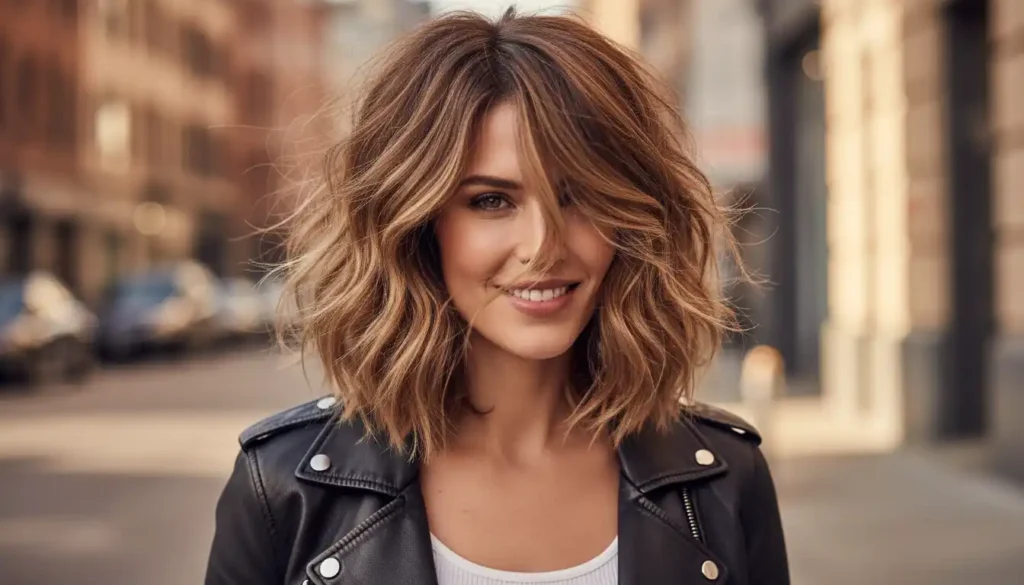
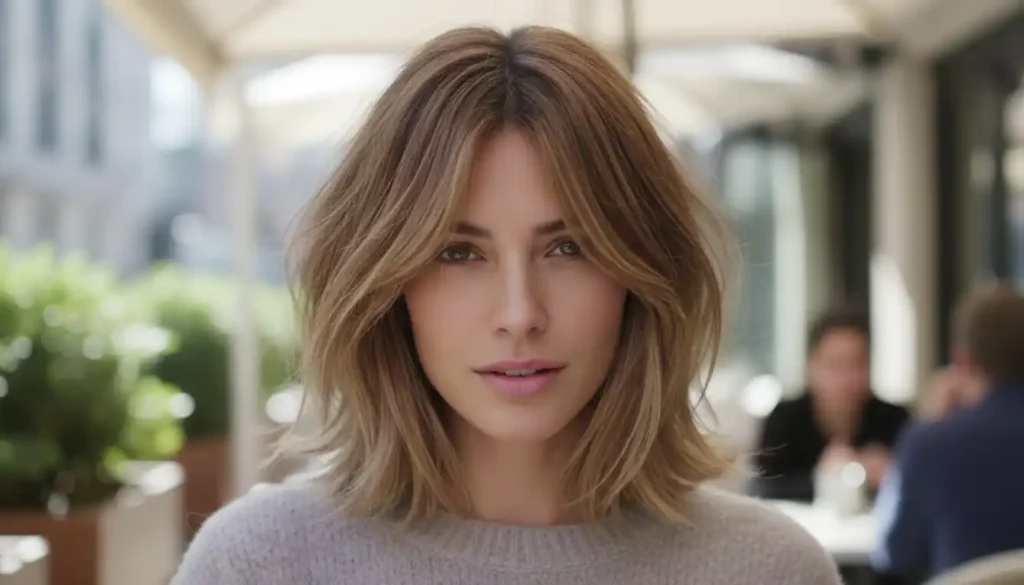
12. The Modern Shag
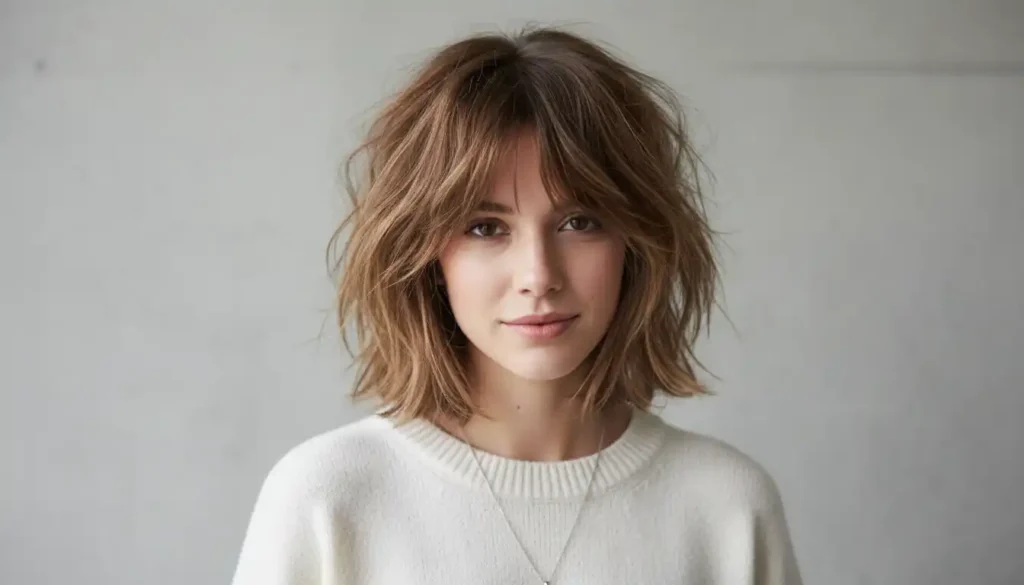
Think ’70s shag meets 2026 sophistication. This layered haircut features lots of texture and movement with choppy layers throughout. The modern shag is less uniform than the classic version, with varied lengths creating that perfectly undone vibe. Perfect for straight to wavy hair that needs personality injected into it.
13. The Butterfly Cut
The butterfly layered haircut gets its name from the way layers are cut to create a butterfly-wing shape when viewed from behind. The layers are short at the crown and gradually lengthen toward the ends. This creates incredible volume and movement, making it ideal for fine hair that needs body. The face-framing layers flutter like butterfly wings with every head turn.
14. The Octopus Cut
Inspired by octopus tentacles (stay with me here), this trendy layered cut features wispy, varying length layers throughout. The top layers are shorter and feathery while lower layers are longer, creating movement in every direction. It’s fun, playful, and perfect for adding volume to fine or medium hair.
15. The Jellyfish Cut
This quirky shoulder-length haircut with layers features a rounded, voluminous top section with longer, straighter layers underneath – mimicking a jellyfish shape. The dramatic difference between the short top layers and longer bottom layers creates a unique, eye-catching silhouette that’s all over social media.
16. The Hush Cut
Subtle and sophisticated, the hush cut features whisper-soft layers that add movement without obvious texture. The layers are delicate and blended, creating a quiet elegance (hence the name). Perfect for women who want the benefits of layers without a dramatic change. This cut works particularly well with curtain bangs.
17. The Mixie Cut
A hybrid between a pixie and a bob, the mixie features short layers at the back with longer layers in front, all hitting around shoulder length. It’s edgy and modern with tons of personality. The varied layer lengths create incredible movement and make this cut super versatile for different styling options.
18. The Bottleneck Bob

This trendy shoulder-length cut features layers that create a “bottleneck” shape – wider at the bottom, narrower at the top. The face-framing layers are cut to curve inward slightly, creating that signature bottleneck silhouette. Super flattering for heart-shaped faces and adds instant sophistication to any look.
19. The Curtain Bang Layer Combo
Trendy curtain bangs paired with soft layers throughout create this ultra-modern look. The layers blend seamlessly with the curtain bangs, creating one cohesive, flowy style. This is probably the most requested shoulder-length layered haircut right now. It’s flattering, low-maintenance, and works with virtually any hair texture.
20. The Disconnected Layer
For the bold and fashion-forward, this cut features intentionally disconnected layers – meaning you can actually see where each layer ends. It’s graphic, modern, and makes a statement. The disconnected layers create a piece-y, textured look that’s edgy and cool. Style with your fingers and texturizing paste for maximum impact.
Low-Maintenance Options
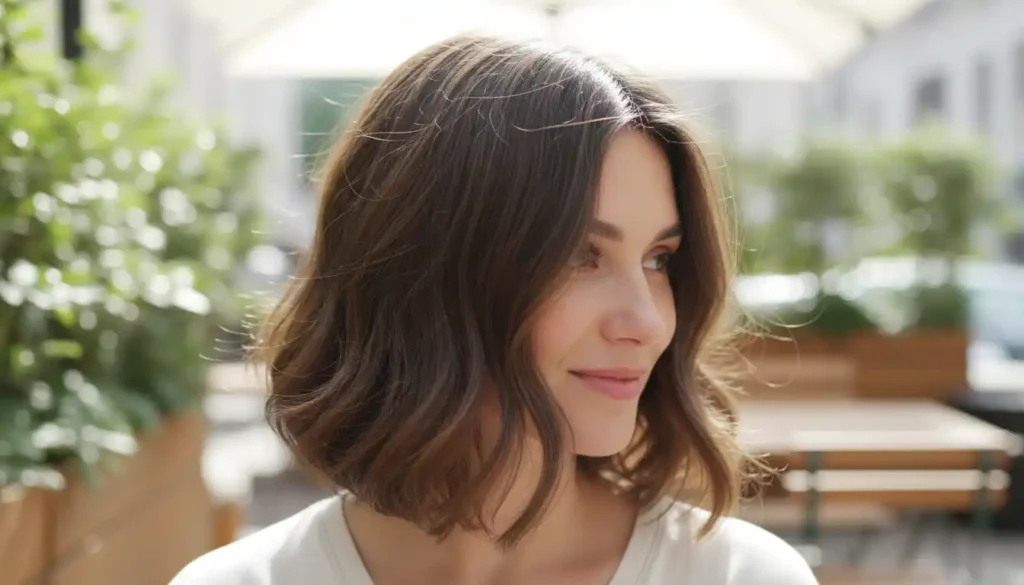
21. The Wash-and-Go Wavy Cut
This shoulder-length haircut with layers is specifically designed to look great air-dried. The layers enhance your natural wave pattern, creating beautiful, effortless texture with zero heat styling required. Just scrunch in curl cream while wet and let it do its thing. Perfect for busy moms or anyone who doesn’t want to spend 30 minutes on their hair every morning.
22. The Air-Dry Friendly Bob
Long layers cut to work with your natural texture mean this bob looks intentional even when you literally just roll out of bed. The layers are placed to create shape and movement without requiring any styling products or tools. If you’ve got naturally wavy or slightly textured hair, this is your dream cut.
23. The Minimal Styling Shag
A textured shag with layers that fall into place naturally. The piece-y layers create built-in style, so even when you don’t “do” your hair, it looks like you did. Apply dry shampoo at the roots, tousle with your fingers, and you’re done. Low effort, high impact.
24. The Grow-Out Friendly Cut
Strategic layers placed to look good even as they grow out. Your stylist cuts the layers with future growth in mind, so you can go longer between trims without things looking shaggy or unkempt. Perfect if you’re trying to grow your hair out but don’t want to deal with that awkward in-between stage.
25. The No-Blow-Dry Bob

This layered shoulder-length bob is cut with precision that allows it to look sleek and polished even when air-dried. The layers are subtle and designed to create shape without requiring a round brush and blow dryer. Towel-dry, apply smoothing cream, and let it air-dry into perfection.
26. The Five-Minute Style
Choppy layers throughout create texture that looks intentional with minimal effort. Blow-dry with your fingers (no brush needed), add a bit of texturizing spray, and you’re done in five minutes flat. The layers do all the work of creating shape and movement without requiring any skill or fancy techniques.
27. The Effortless Texture Cut
Razored layers create soft, natural-looking texture that requires zero styling. The razoring technique means your hair dries with built-in movement and body. This cut is perfect for naturally straight hair that tends to lie flat – the layers add life without any effort on your part.
28. The Second-Day Hair Specialist
This layered cut is designed to look even better on day two. The layers hold their shape and gain texture as natural oils distribute through your hair. Use dry shampoo at the roots and embrace the slightly lived-in texture. Your hair will look better on day two than day one.
29. The Vacation Hair Cut
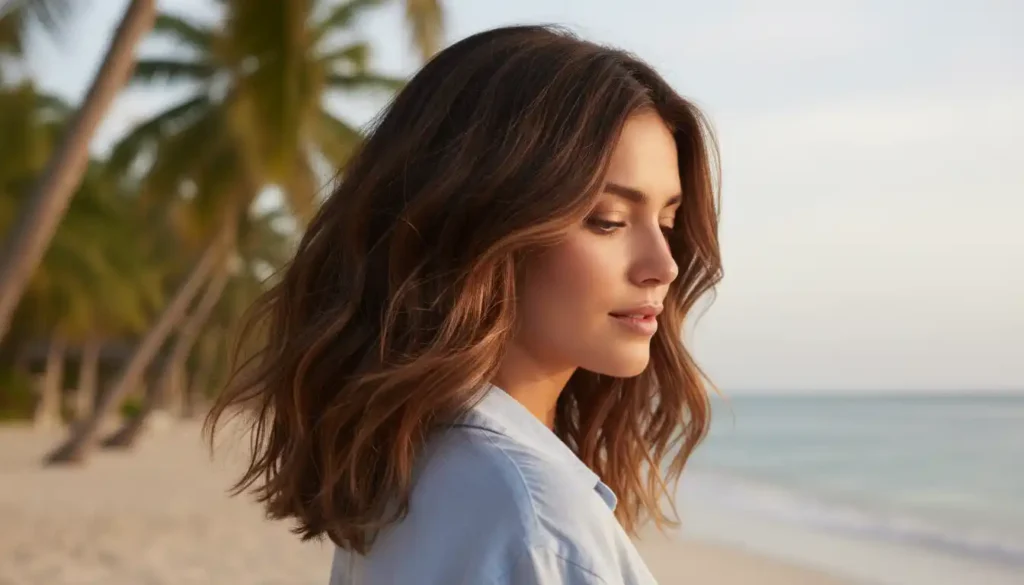
Perfect for women who travel frequently or live in humid climates, this shoulder-length layered haircut features long layers that work with – not against – humidity. The layers prevent frizz from creating a triangle shape and instead channel it into beachy, tousled texture. Embrace the frizz and call it texture.
30. The Busy Mom Bob
Let’s be real – moms need haircuts that look good with minimal time investment. This layered bob features strategic layers that create shape even when you barely have time to brush your hair. Throw it in a low ponytail or bun and the layers around your face still look intentional and polished.
Step-by-Step Guide: How to Style Layered Shoulder-Length Hair
Having the right shoulder-length haircut with layers is only half the battle. Now let’s talk about styling it at home. These techniques will help you get salon-worthy results without the salon price tag.
The Sleek and Straight Look
What you need:
- Heat protectant spray
- Paddle brush
- Blow dryer
- Flat iron
- Shine serum
Step 1: Start with freshly washed, towel-dried hair. Spray heat protectant generously throughout, paying special attention to your layers since they’re most vulnerable to heat damage.
Step 2: Using a paddle brush and blow dryer, dry your hair in sections from roots to ends. Pull the brush downward with tension to create smoothness. The layers will naturally fall into place as you dry them straight.
Step 3: Once completely dry, take your flat iron and work in 1-inch sections. Start at your roots (but not touching your scalp) and glide down through the layers in one smooth motion. Don’t pause midway or you’ll create dents.
Step 4: Pay special attention to your face-framing layers. You can either keep them straight or add a very slight bend by rotating the flat iron slightly as you pass through the ends.
Step 5: Finish with a tiny amount of shine serum concentrated on your ends and the ends of your layers. Don’t apply to your roots or you’ll look greasy.
Pro tip: The secret to sleek, straight layered hair is working in small sections and not rushing. Take your time with each section and you’ll get that glass-like smoothness.
Bouncy Waves Tutorial
What you need:
- Heat protectant
- Round brush (medium to large barrel)
- Blow dryer
- Curling iron (1.25-inch barrel)
- Texturizing spray
- Light-hold hairspray
Step 1: Apply heat protectant to damp hair and blow-dry using a round brush, focusing on adding volume at the roots. Don’t worry about making it perfect – you’re just creating a foundation.
Step 2: Once dry, heat up your curling iron to 350-375°F (depending on your hair thickness). Section your hair into four parts: two in front, two in back.
Step 3: Take 1-inch sections and wrap them around the curling iron, holding for 8-10 seconds. Here’s the key: alternate the direction you wrap. Wrap the first section away from your face, the next toward your face, and so on. This creates natural-looking, bouncy waves.
Step 4: Pay special attention to how you curl your layers. Shorter layers need less time on the iron (maybe 6-7 seconds) to avoid over-curling.
Step 5: Once all sections are curled, let your hair cool completely (this step is crucial!). Then gently run your fingers through to break up the curls into waves.
Step 6: Spray texturizing spray throughout, focusing on the mid-lengths and ends of your layers. This adds hold and that perfect “piece-y” texture.
Step 7: Finish with a light mist of hairspray. Hold the can 10-12 inches away and mist lightly – you want movement, not stiffness.
Pro tip: The cooling step is what makes this last. If you try to style your hair while it’s still warm, the curl will fall out within hours.
Tousled Beachy Texture
What you need:
- Sea salt spray
- Curl-enhancing cream
- Blow dryer with diffuser attachment
- Optional: Curling wand for touch-ups
Step 1: On damp, towel-dried hair, apply a quarter-sized amount of curl-enhancing cream. Work it through your layers, scrunching as you go.
Step 2: Spray sea salt spray throughout, concentrating on the mid-lengths and ends of your layers. This is what creates that beachy, textured look.
Step 3: Scrunch your hair upward toward your scalp, encouraging your natural wave pattern to form. The layers will naturally create dimension as different lengths dry at different rates.
Step 4: Attach your diffuser to your blow dryer and set it to low heat, medium speed. Cup sections of hair in the diffuser bowl and lift toward your scalp. Hold for 20-30 seconds, then release and move to the next section.
Step 5: Let the last 20% air-dry. This prevents over-drying and maintains that natural, beachy texture.
Step 6 (Optional): If some sections need more definition, use a curling wand on random pieces of your layers, wrapping loosely and holding for just 5-6 seconds. This adds extra texture without making it look overly styled.
Step 7: Scrunch in a tiny bit more sea salt spray for extra hold and texture. Don’t brush or comb – you want that piece-y, separated look.
Pro tip: This style actually looks better on second-day hair. Sleep with your hair in a loose bun and refresh in the morning with dry shampoo and sea salt spray.
Voluminous Blow-Out
What you need:
- Volumizing mousse
- Heat protectant spray
- Round brush (large barrel, 2-3 inches)
- Blow dryer with concentrator nozzle
- Shine spray
- Light hairspray
Step 1: On damp hair, apply volumizing mousse to your roots, working it in with your fingers. This creates the foundation for long-lasting volume.
Step 2: Spray heat protectant throughout your layers.
Step 3: Flip your head upside down and rough-dry your hair about 70% dry using just your hands. This adds volume at the roots that you’ll refine with the round brush.
Step 4: Flip right-side up and section your hair. Starting with the bottom layers, take 2-inch sections and wrap them around your large round brush.
Step 5: With your blow dryer’s concentrator nozzle pointing down the hair shaft (this smooths the cuticle), dry the section while creating tension with the brush. Roll the brush toward your head to create volume, then roll it through to the ends while directing hot air down the length.
Step 6: Here’s the secret step: once the section is dry, hit it with cool air while still wrapped around the brush. This sets the volume and smoothness.
Step 7: Work your way up through all your layers, always lifting the sections away from your head for maximum volume.
Step 8: Pay special attention to your face-framing layers. Blow-dry these pieces up and away from your face, rolling the ends under slightly or leaving them straighter depending on your preference.
Step 9: Once all sections are dry and cool, gently shake your head to let the layers settle naturally.
Step 10: Spray your roots lightly with hairspray, then lift sections and spray underneath for extra hold. Finish with a light mist of shine spray.
Pro tip: The key to volume that lasts is the cool air setting step. Hot air opens the cuticle and shapes the hair, but cool air closes the cuticle and locks in that shape.
Best Products for Maintaining Layered Shoulder-Length Hair
The right products make all the difference when you’re working with layers. Here’s what actually works.
Essential Styling Products
Heat Protectant Spray
This is non-negotiable if you use heat tools. Layers mean more exposed ends, and ends are the most vulnerable to heat damage. Apply heat protectant to damp hair before any heat styling to prevent fried, crispy layers.
What to look for: A spray formula that distributes evenly, protects up to 450°F, and doesn’t leave residue or make hair feel stiff.
Texturizing Spray
This is the secret weapon for making shoulder-length layered haircuts look effortlessly styled. Texturizing spray adds grip, separation, and that perfectly undone look to your layers. It’s especially important for fine hair that needs more texture and body.
When to use it: On dry or nearly-dry hair. Spray throughout your layers, then scrunch or tousle with your fingers. It instantly transforms flat, one-dimensional hair into textured, piece-y perfection.
Volumizing Mousse
For layers that need lift, volumizing mousse is your best friend. It adds body at the roots without weighing down your layers. The foam formula distributes evenly and doesn’t leave that crunchy feeling some gels can create.
Application tip: Apply to damp roots, work it in with your fingers, then blow-dry. The heat activates the volumizing properties, and your layers will have body for days.
Shine Serum
Layers can sometimes look dry or frizzy at the ends since they’re cut shorter and more exposed. A lightweight shine serum smooths the cuticle, adds luminosity, and makes your layers look healthy and polished.
How much to use: Start with literally 2-3 drops. Rub between your palms, then smooth over the ends of your layers. You can always add more, but you can’t remove it if you use too much.
Dry Shampoo
This extends the life of your styled layers between washes. Spray it at your roots on day two or three to absorb oil and add volume. Dry shampoo actually makes layers look better on non-wash days by adding texture and grip.
Pro technique: Spray dry shampoo before bed (not in the morning). This gives it time to absorb oil overnight, and you’ll wake up with refreshed, volumized layers.
Tools You’ll Actually Use
Round Brush (Which Size Matters)
For shoulder-length layered hair, you need a 2-3 inch barrel round brush. This size is perfect for creating volume without over-curling. Smaller barrels create too much curl, while larger barrels don’t create enough lift.
What to look for: Ceramic or metal core (retains heat better), boar bristles mixed with nylon (boar smooths, nylon grips), and a comfortable handle since you’ll be holding it while blow-drying.
Curling Iron Specifications
For shoulder-length layers, a 1 to 1.25-inch barrel is ideal. This size creates waves that look natural and not too tight or too loose. Spring-loaded clamp irons are easier for beginners, while wand-style gives more control.
Temperature guide: Fine hair = 300-350°F, medium hair = 350-400°F, thick or coarse hair = 400-450°F. Your layers are more delicate, so start with lower heat and increase only if needed.
Blow Dryer Features to Look For
A quality blow dryer makes styling your layers so much easier. Look for these features:
- Multiple heat and speed settings: You need control. High heat/high speed for initial drying, then lower heat for styling your layers
- Cool shot button: Essential for setting your layers and locking in volume
- Ionic technology: Reduces frizz by breaking down water molecules faster
- Lightweight design: You’re holding this thing up while styling your layers. Weight matters.
- Concentrator nozzle: Directs airflow precisely where you want it on your layers
Diffuser attachment: If you have wavy or curly hair, this is crucial for defining your layers without creating frizz.
Maintenance Schedule: Keeping Your Layers Fresh
Layers need regular maintenance to look their best. Here’s your schedule.
How Often to Trim
For choppy, textured layers: Every 4-6 weeks
Choppy layers lose their shape faster than blended layers. The textured, piece-y look depends on precision, so you’ll need more frequent trims to maintain that intentional messiness.
For soft, blended layers: Every 6-8 weeks
If your layers are subtle and well-blended, you can stretch a bit longer between cuts. The gradual growth won’t be as noticeable, and your shoulder-length cut will still look intentional.
For long layers: Every 8-10 weeks
Long layers grow out the most gracefully since the difference between lengths is more subtle. You can go a bit longer between trims without your cut looking grown-out.
For fine hair: Every 5-7 weeks
Fine hair shows split ends faster, and split ends travel up the hair shaft, making your layers look stringy and unhealthy. More frequent trims keep your layers looking full and fresh.
For thick hair: Every 6-8 weeks
Thick hair can go slightly longer between cuts, but don’t push it past 8 weeks. Your layers will lose their shape and start to feel heavy again.
Between-Cut Care Tips
Trim your own bangs (if you’re brave)
If you have bangs with your shoulder-length layered haircut, you’ll want to trim them between salon visits. Bangs grow faster than the rest of your hair, and waiting 8 weeks between trims means dealing with bangs in your eyes.
How to do it: Use sharp hair-cutting scissors (not craft scissors!), cut on dry hair, and trim tiny amounts at a time. Point-cut (cutting into the hair at an angle) rather than cutting straight across for softer, more natural-looking results.
Deep condition your layers regularly
The ends of your layers are older hair and more prone to damage and dryness. Deep condition once a week, concentrating product on your mid-lengths and ends. This keeps your layers looking healthy and prevents that straw-like texture.
Protect your hair while sleeping
Friction from your pillowcase can damage your layers and create frizz. Sleep on a silk or satin pillowcase, or tie your hair in a loose, low bun to protect your layers while you sleep.
Use a heat protectant every single time
This bears repeating because it’s so important. Your layers have more exposed ends than one-length hair, making them more vulnerable to heat damage. Never skip the heat protectant, even for quick touch-ups.
Get face-framing layers touched up solo
Between full cuts, you can book a quick “bang trim” appointment (usually $15-25) to refresh just your face-framing layers. This keeps the most visible part of your cut looking fresh without paying for a full haircut.
When to Try Something New
Sometimes you need to know when it’s time to switch things up with your shoulder-length layered haircut.
Your layers look stringy or thin
This means your layers are too long or damaged. Time for fresh layers and possibly a slight length change to remove damaged ends.
You’re constantly fighting your cut
If you’re spending 30 minutes every morning wrestling your layers into submission, the cut isn’t right for your hair type or texture. Talk to your stylist about a more manageable approach.
You’re bored
Hair boredom is real! If your shoulder-length layers aren’t exciting you anymore, it’s time to try a different layer style, add bangs, or experiment with length.
Your face shape has changed
Weight loss, weight gain, aging – these all change your face shape slightly. The layers that were perfect five years ago might not be flattering anymore. Reassess and adjust.
Your lifestyle changed
Had a baby? New job? New fitness routine? Your hair needs might have changed too. If your old layered cut doesn’t fit your current lifestyle, don’t force it. Find something that works for your real life right now.
Common Mistakes to Avoid With Layered Cuts
Learn from other people’s mistakes so you don’t have to make them yourself.
Mistake #1: Asking for layers without specifying what kind
“Layers” is such a broad term. Are you talking long layers, short choppy layers, face-framing layers? Your stylist can’t read your mind. Bring pictures and be specific about what you want.
Why it matters: You might end up with dramatic choppy layers when you wanted subtle long layers, or vice versa.
Mistake #2: Getting heavy layers on fine hair
Too many layers or layers that are too short can make fine hair look thin and stringy. Fine hair needs strategic, subtle layers that add movement without removing too much density.
The fix: Ask for long, face-framing layers and subtle internal layers that add movement without making your hair look sparse.
Mistake #3: Skipping layers on thick hair
Some women with thick hair avoid layers because they think it’ll make their hair look poofy. Actually, the opposite is true. The right layers remove bulk and weight, making thick hair more manageable.
The solution: Ask your stylist for weight-removing layers. They’ll thin out the interior while maintaining density at the perimeter, so you keep fullness without heaviness.
Mistake #4: Cutting layers yourself
I get it, you watched a YouTube tutorial and it looked easy. But layers require precision and an understanding of how hair falls and moves. One wrong snip and you’re dealing with a bad haircut for months.
Reality check: Leave layering to the professionals. Home trims are fine for bangs or minimal tidying up of ends, but don’t attempt to cut layers yourself.
Mistake #5: Using too much product on layers
Layers are lighter and more delicate than the rest of your hair. Heavy products weigh them down and make them look greasy or stringy.
The rule: Start with less product than you think you need, and focus application on ends and mid-lengths, avoiding roots.
Mistake #6: Blow-drying layers with too much heat
The ends of your layers are the oldest, most fragile parts of your hair. Blasting them with high heat causes damage faster than you can say “split ends.”
The better way: Use medium heat while blow-drying your layers, and finish with cool air to seal the cuticle. Your layers will look smoother and stay healthier.
Mistake #7: Getting layers without considering your styling commitment
Some layered cuts are wash-and-go friendly. Others require daily styling to look intentional. Be honest with yourself about how much time you’ll actually spend on your hair.
Before you commit: Ask your stylist how much daily maintenance the cut requires. If it’s more than you’re willing to do, choose a different style.
Talking to Your Stylist: How to Get the Cut You Want
Communication is everything when it comes to getting the perfect shoulder-length haircut with layers.
What to Bring to Your Appointment
Multiple reference photos
Don’t just bring one picture. Bring 3-5 images showing the layered cut from different angles. Your stylist needs to see the front, back, and sides to understand the full picture.
What to look for in photos: Pay attention to where the layers start, how long they are, and how blended or choppy they look. Also notice the hair texture in the photo – if you have curly hair and the photo shows straight hair, your layers will look different.
Photos of what you DON’T want
This is just as important as showing what you do want. Show your stylist examples of layers you hate so they know what to avoid.
Your hair history
If you’ve had bad experiences with layers in the past, tell your stylist what went wrong. This helps them avoid repeating past mistakes.
Key Questions to Ask
“How will these layers work with my hair texture?”
Don’t assume the layers in your reference photo will look the same on your hair. Ask your stylist to explain how your specific hair texture will affect the cut.
“How much time will this cut require daily?”
Be realistic. If your stylist says, “about 30 minutes of styling,” and you have 10 minutes, this isn’t the cut for you.
“How often will I need trims?”
Some layered cuts need frequent maintenance, others grow out gracefully. Know what you’re signing up for.
“Can you show me how to style this at home?”
Many stylists are willing to walk you through the styling process during your appointment. Take notes or even record a video (with permission) so you can recreate the look at home.
“What products do I absolutely need?”
Stylists know which products will make your layers look their best. Ask for specific recommendations, not just product types.
How to Describe What You Want
Use specific descriptors instead of vague terms. Here’s a translation guide:
Instead of saying: “I want layers” Say: “I want long, blended layers starting at my collarbone that remove bulk but maintain thickness”
Instead of saying: “I want it to look natural” Say: “I want soft, feathered layers that look effortless when air-dried”
Instead of saying: “I want volume” Say: “I want short layers at the crown to create lift, with longer layers throughout for movement”
Instead of saying: “I want it shorter” Say: “I want to keep the length at my shoulders but add choppy layers throughout for texture”
Instead of saying: “I want face-framing” Say: “I want layers that start at my cheekbones and gradually blend into the length”
The magic words: “Can you explain your plan before you start cutting?” A good stylist will walk you through their vision and make sure you’re on the same page before taking scissors to your hair.
Seasonal Styling: Adapting Your Layers Throughout the Year
Your shoulder-length layers can be styled differently depending on the season. Here’s how to adapt your look throughout the year.
Spring/Summer Looks
When temperatures rise, you’ll want to style your layers in ways that keep you cool and embrace the season’s relaxed vibe.
The Beachy Wave
Perfect for warm weather, this style embraces texture and doesn’t require precision styling. Use sea salt spray on damp layers, scrunch, and let air-dry. Your layers will create natural, piece-y waves that look like you spent the day at the beach.
The Sleek Low Bun
Pull your layered hair into a low bun, leaving some of your face-framing layers out to soften the look. It’s polished enough for work but keeps hair off your neck in the heat.
The Half-Up Top Knot
Gather the top layers into a small bun on your crown, leaving the rest of your shoulder-length hair down. This keeps hair out of your face while showing off your layers.
Embracing Natural Texture
Summer humidity makes perfectly straight hair nearly impossible anyway. Work with your natural texture by applying curl-enhancing cream to your layers and letting them air-dry with their natural wave or curl.
Fall/Winter Styles
Cooler months mean you can rock styles that require more heat or simply look better with the season’s aesthetic.
The Voluminous Blowout
Cold weather is perfect for full, bouncy blow-outs. Use the round brush technique on your layers to create volume and polish. The cool air helps your style last longer, and you won’t sweat it out within an hour.
Tuck and Smooth
Tuck your shoulder-length layered hair behind your ears and smooth with a flat iron for a sleek, polished look that pairs perfectly with fall scarves and winter coats.
The Messy French Twist
Gather your layers into a low, loose French twist, allowing some pieces to fall out around your face. It’s elegant enough for holiday parties but relaxed enough for everyday wear.
Glossy Straight Layers
Embrace a sleek, straight style that shows off the shape of your layers. Use a flat iron and finish with shine serum for that glossy, healthy look that complements winter’s darker color palette.
Hat-Friendly Styling
Since you’ll be wearing hats, style your layers in ways that look good after hat hair. Loose waves or textured styles bounce back better than precise, smooth styles that get crushed under beanies.
Celebrity Inspiration: Iconic Shoulder-Length Layered Cuts
Sometimes the best way to communicate what you want is to reference a celebrity’s layered haircut. Here are some iconic examples.
Jennifer Aniston – The Rachel and Beyond
The OG shoulder-length layered haircut that launched a million salon requests. While “The Rachel” from the ’90s was heavily layered with lots of volume, Aniston’s modern layered cuts are more subtle and grown-up. She typically sports long layers that start around her collarbone with soft face-framing layers.
Why it works: The layers remove bulk from her thick hair while maintaining fullness and movement. The face-framing pieces highlight her features without overwhelming her face.
Ask for: Long blended layers starting at the collarbone with soft face-framing that begins at the cheekbones.
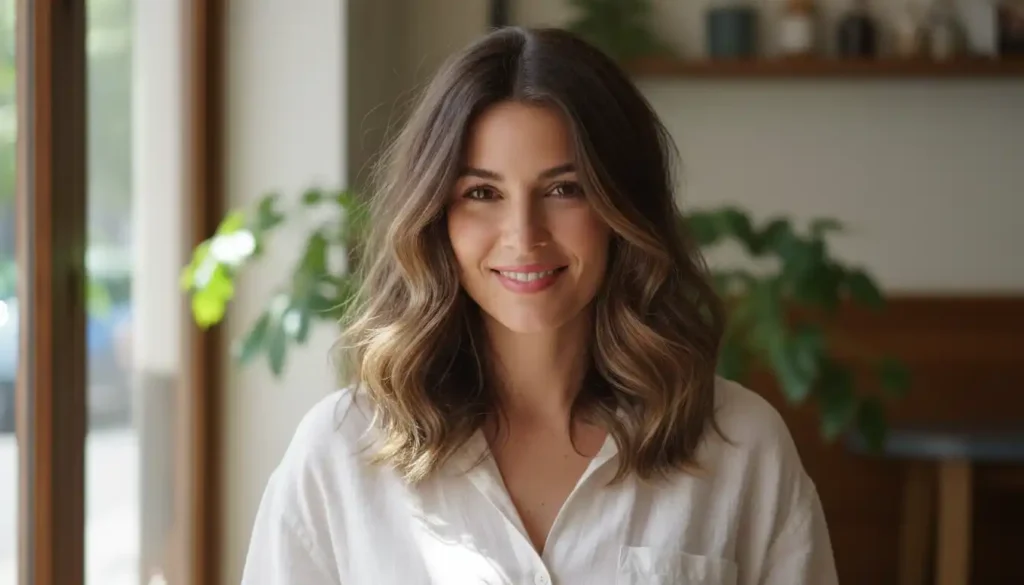
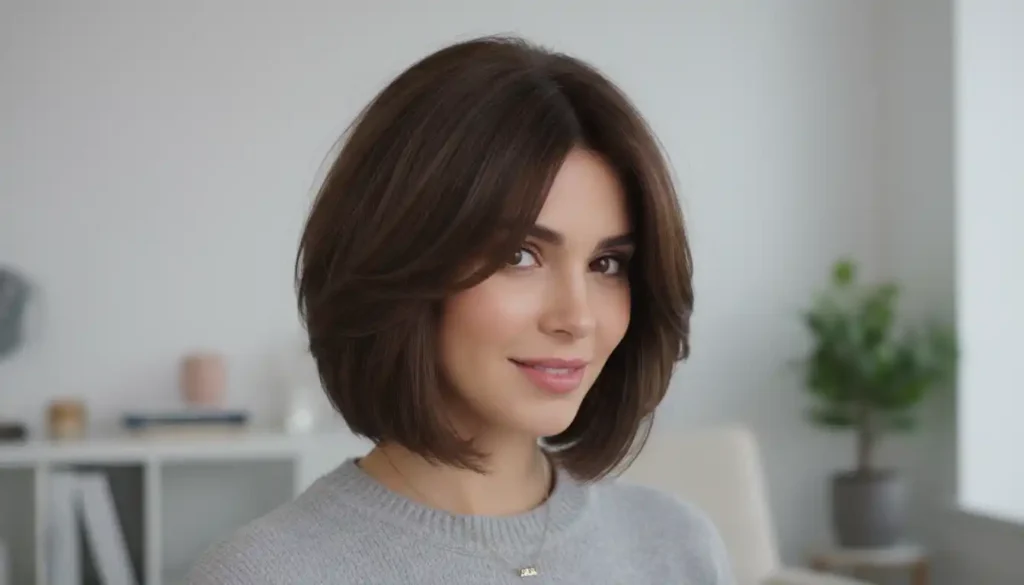
Selena Gomez – The Modern Lob
Gomez has rocked various versions of shoulder-length layered cuts, but her layered lob is especially flattering. She typically keeps the cut just above her shoulders with subtle layers throughout and occasional curtain bangs.
Why it works: The layered lob adds movement to her straight hair without requiring tons of styling. The subtle layers prevent it from looking too blunt or heavy.
Ask for: A lob that hits at the collarbone with soft, blended layers throughout and optional curtain bangs.
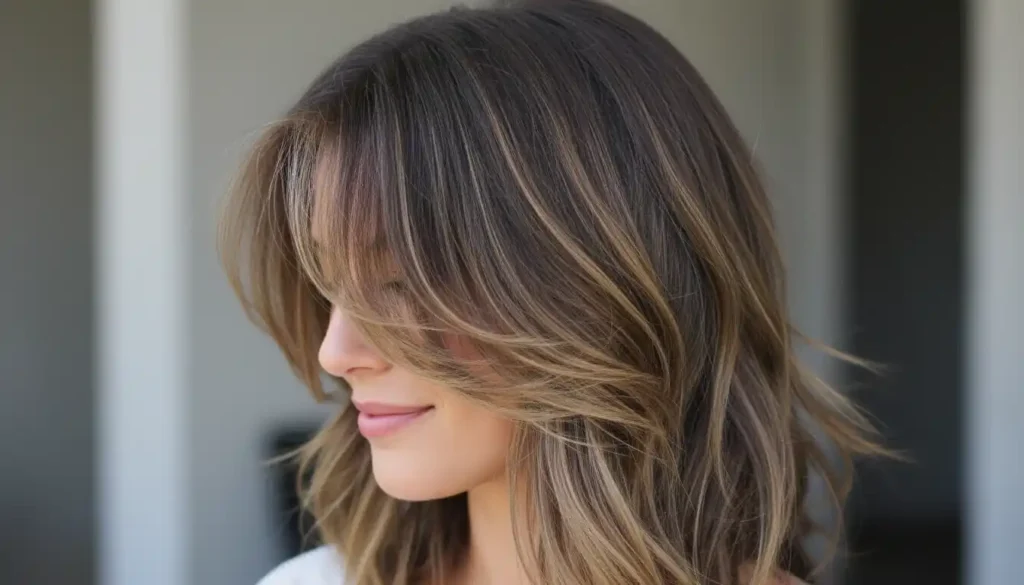
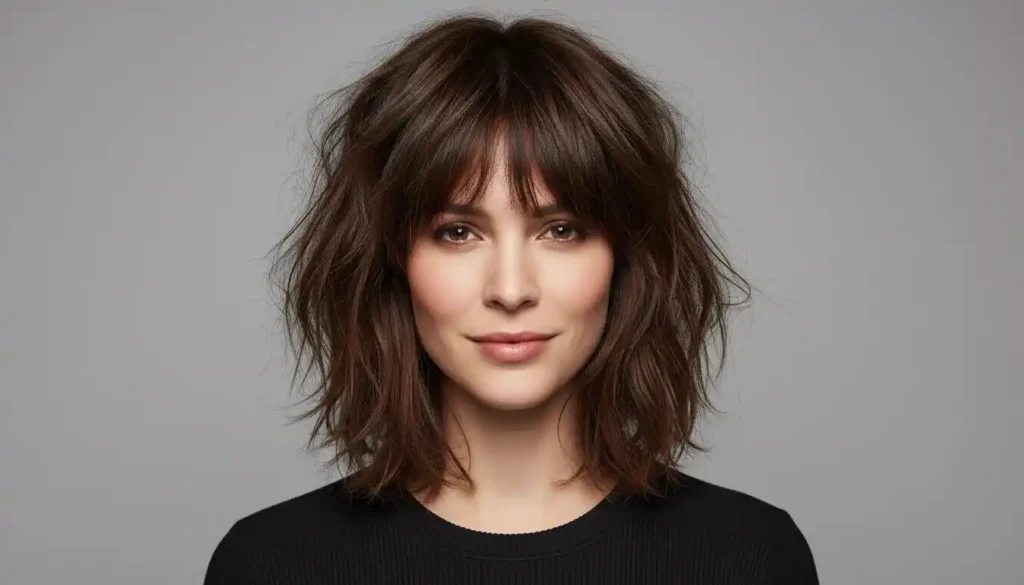
Lucy Hale – The Textured Shag
Hale has sported various layered cuts, including a gorgeously textured shag with choppy layers throughout. Her darker hair color makes the layers even more dimensional and eye-catching.
Why it works: The choppy layers add texture and movement to her naturally straight hair. The varied lengths create that effortlessly cool, rock-and-roll vibe.
Ask for: A textured shag with choppy layers throughout, starting at the ears and gradually lengthening toward the bottom.
Jenna Ortega – The Subtle Layer
Ortega often wears her shoulder-length hair with very subtle, long layers that create gentle movement without obvious texture. Her cut typically features soft face-framing that blends seamlessly into the overall length.
Why it works: The subtle approach to layers keeps her hair looking thick and healthy while preventing it from looking too heavy or one-dimensional.
Ask for: Long, subtle layers starting below the collarbone with soft face-framing around the face.
Margot Robbie – The Blonde Bombshell Layers
Robbie’s shoulder-length layers often feature more dramatic, piece-y texture that creates that sexy, tousled look. Her layers are typically styled with waves or curls that show off the dimension.
Why it works: The textured layers create volume and movement in her fine to medium-density hair. The layers prevent her blonde hair from looking flat.
Ask for: Medium to long layers throughout with some shorter, choppy layers around the face for texture and movement.
Taylor Swift – The Soft Romantic Layer
Swift’s shoulder-length cuts often feature soft, romantic layers with gentle waves. Her layers are blended seamlessly and typically styled with her signature soft curls.
Why it works: The soft layers create that feminine, romantic aesthetic without being overly dramatic. They add just enough movement and dimension.
Ask for: Soft, blended layers throughout with special attention to face-framing layers that start at the cheekbones.
Zendaya – The Versatile Cut
While Zendaya experiments with many lengths, her shoulder-length layered cuts showcase incredible versatility. She styles her layers everything from sleek and straight to voluminous curls, proving how adaptable the right layered cut can be.
Why it works: The strategic layer placement allows for multiple styling options, from texture to sleek, making it perfect for someone who likes to change their look frequently.
Ask for: Versatile layers that can be styled multiple ways – ask your stylist to cut layers that work with both your natural texture and heat-styled looks.
Troubleshooting Guide: Fixing Common Layer Problems
Even with the best shoulder-length layered haircut, problems can arise. Here’s how to fix them.
My Layers Look Too Choppy
The problem: Your layers look disconnected and piece-y in a way that feels messy rather than intentionally textured.
Quick fix: Use a smoothing serum on damp hair and blow-dry with a paddle brush to blend the layers together. The tension from the brush will smooth things out.
Long-term solution: Ask your stylist to blend your layers more. They can use texturizing techniques to soften the lines between layers without removing them entirely.
Prevention: When asking for layers, specify “blended” or “soft” layers if you want a more subtle look.
I’m Losing Too Much Volume
The problem: Your layers are falling flat, especially at the roots, making your hair look limp and lifeless.
Quick fix: Flip your head upside down and spray dry shampoo at your roots, then massage it in with your fingers. Flip back up and your layers will have instant lift.
Long-term solution: Add shorter layers at the crown specifically for volume. These “interior layers” create lift without affecting the overall length.
Prevention: Use volumizing products at your roots before styling, and blow-dry with a round brush to create lift from the start.
The Layers Won’t Blend
The problem: You can clearly see where each layer ends, creating obvious steps in your hair rather than smooth transitions.
Quick fix: Style your layers with waves or curls. The texture hides the layer lines and creates a more blended appearance.
Long-term solution: Your stylist needs to go back in and blend the layers better. This might mean point-cutting the ends or using texturizing techniques to soften the transitions.
Prevention: Ask for “blended layers” or “seamless layers” so your stylist knows you don’t want obvious steps.
My Hair Flips Out Weird
The problem: Your shoulder-length layers want to flip outward instead of curling under, and it looks unintentional and awkward.
Quick fix: Embrace it! Flip your layers out intentionally with a flat iron or round brush for a playful ’60s-inspired look.
Alternative fix: If you want them to curl under, blow-dry your layers with a round brush, rolling the brush under as you dry. The heat will train your layers to curve inward.
Long-term solution: If your layers naturally flip out due to your hair’s growth pattern or texture, work with it instead of against it. Ask your stylist to cut your layers with this in mind.
Prevention: Discuss your hair’s natural tendencies with your stylist before they cut. They can adjust the layer placement to work with (not against) how your hair naturally wants to fall.
Comparison Table: Finding Your Perfect Match
| Style Name | Best For Hair Type | Best For Face Shape | Maintenance Level | Styling Time |
| Long Layered Lob | Thick, Medium | Oval, Square | Low | 10-15 min |
| Choppy Textured Bob | Fine, Medium | Round, Heart | Medium | 15-20 min |
| Classic Shoulder Cut | All Types | All Shapes | Low | 10 min |
| Face-Framing Layers | All Types | All Shapes | Low-Medium | 15 min |
| Feathered ’70s Style | Thick, Coarse | Oval, Long | Medium | 20-25 min |
| Modern Shag | Medium, Thick | Round, Square | Medium-High | 20 min |
| Blunt with Subtle Layers | Fine, Thin | Long, Oval | Low | 10 min |
| Wolf Cut | All Types | Oval, Square | Medium | 15-20 min |
| Butterfly Cut | Fine, Medium | All Shapes | Medium | 15-20 min |
| Curtain Bang Combo | All Types | All Shapes | Medium | 20 min |
| Beachy Wave Layers | Wavy, Curly | All Shapes | Low | 5-10 min |
| Sleek Straight Layers | Straight | All Shapes | Medium-High | 20-25 min |
| Tousled Texture | Wavy, Medium | All Shapes | Low | 10 min |
| Razored Shag | Straight, Wavy | Round, Square | Medium | 15 min |
| Voluminous Layers | Fine, Thin | Round, Long | High | 25-30 min |
| Soft Romantic Layers | Medium, Thick | Heart, Oval | Medium | 15-20 min |
| Piece-y Choppy Cut | Fine, Medium | All Shapes | Medium | 15 min |
| Long Layer with Bangs | All Types | Oval, Heart | Medium | 20 min |
| Textured Flip Out | Medium, Thick | Square, Round | Low-Medium | 15 min |
| Messy Midi | All Types | All Shapes | Low | 5-10 min |
FAQs About Shoulder-Length Haircuts With Layers
Q1: How often should I get my layered hair trimmed?
It depends on the type of layers you have. Choppy, textured layers need trims every 4-6 weeks to maintain their shape. Soft, blended layers can go 6-8 weeks between cuts. Long layers grow out the most gracefully and can stretch to 8-10 weeks. Fine hair shows split ends faster, so stick to the shorter end of this range. Thick hair can often go a bit longer. But here’s the thing – don’t push it too far past these recommendations or your layers will lose their shape completely and you’ll need a more dramatic cut to fix it.
Q2: Will layers make my thin hair look thinner?
Not if they’re done right! The key is getting the correct type of layers for thin hair. You want long, subtle layers that add movement without removing too much density. Short, choppy layers can make thin hair look stringy and sparse. Ask your stylist for “interior layers” – these are cut underneath to add body without making the exterior look thin. Also consider keeping a blunt perimeter while adding layers inside – this makes your hair look thicker at the ends while the internal layers add movement.
Q3: Can I add layers to my current shoulder-length cut?
Absolutely! Adding layers to existing shoulder-length hair is one of the easiest ways to refresh your look without changing your length. Your stylist will assess your current cut and add layers strategically based on your hair type and face shape. However, be aware that once you add layers, you can’t simply “remove” them – you’d have to grow them out or cut everything to the shortest layer length. Make sure you’re ready for the commitment before you add layers.
Q4: What’s the difference between long layers and short layers?
Long layers start below your chin (usually around collarbone-length) and create subtle, blended movement. The difference between your longest and shortest layers is minimal, so the overall effect is soft and natural. Short layers start much higher (sometimes at ear level or above) and create dramatic texture and volume. The difference between lengths is more obvious, creating that choppy, piece-y look. Long layers are low-maintenance and conservative. Short layers are high-impact and require more styling.
Q5: How do I prevent my layers from looking dated?
The key is in the styling and the specific type of layers you choose. Heavily feathered layers or obvious “step-cut” layers can look outdated. Modern layers are more blended and natural-looking. Keep your layers looking fresh by using current styling techniques (beachy texture, not over-curled), maintaining your color (grown-out roots or faded color ages any cut), and getting regular trims so your layers don’t grow out into that dated feathered look. When in doubt, bring photos of current celebrity layered cuts to your stylist.
Q6: Can layers work with very thick hair?
Yes! In fact, layers are often the solution for managing thick hair. The right layers remove bulk and weight without making your hair look thin. Ask your stylist for weight-removal layers or internal layers that thin out the interior of your hair while maintaining density at the perimeter. This keeps your hair looking thick and full while making it more manageable. Thick hair can handle more dramatic layers than fine hair, so don’t be afraid of choppy or heavily textured layers if that’s the look you want.
Q7: What should I tell my stylist if I want face-framing layers?
Be specific about where you want those layers to start and how dramatic you want them to be. Say something like, “I want face-framing layers that start at my cheekbones and gradually blend into the rest of my hair.” Bring reference photos showing the exact face-framing you want. Some women want dramatic, short face-framing that starts at their eyes, while others want subtle pieces that start at their jawline. Also mention whether you want these layers to be blended (for a soft look) or more piece-y and choppy (for edge). Your stylist can’t read your mind, so the more specific you are, the better.
Q8: How do I style layers on naturally curly hair?
The key with layered curly hair is to work with your natural curl pattern, not against it. Here’s the best method: Apply curl-enhancing cream to soaking wet hair, then scrunch upward toward your scalp to encourage curl formation. Use a diffuser on low heat to dry your layers without disrupting the curl pattern. Never brush or comb your layers when dry – this creates frizz and destroys your curl definition. Your layers should enhance each individual curl, creating that beautiful, dimensional look curly hair is meant to have. If some layers need extra definition, you can carefully finger-curl them while wet, but generally, your layers should work with your natural texture.
Your Journey to Perfect Layers Starts Now
So there you have it – everything you need to know about shoulder-length haircuts with layers. From understanding different layer types to troubleshooting common problems, you’re now equipped with the knowledge to get the layered cut of your dreams.
The beauty of shoulder-length layered hair is that it truly works for everyone. Whether you have thick hair that needs taming, fine hair that needs volume, or something in between, there’s a layered cut that’ll transform your look. And the versatility? Unmatched. You can wear your layers sleek and professional, tousled and beachy, or voluminous and glamorous – all from the same cut.
Now here’s where it gets interesting. The difference between a good layered cut and a great one often comes down to communication with your stylist. Use the tips from this guide – bring photos, ask specific questions, and be clear about your styling commitment level. Don’t just say “I want layers” and hope for the best. The more specific you are, the better your results will be.
Remember, your shoulder-length layered haircut should work with your lifestyle, not against it. If you only have 10 minutes to style your hair in the morning, don’t get a high-maintenance cut that requires 30 minutes of blow-drying. Be honest with yourself and your stylist about what you’ll actually do with your hair on a daily basis.
Ready to transform your look? Save your favorite styles from this guide and take them to your next salon appointment. Screenshot the comparison table so you can reference it when deciding which layered cut is right for you. And don’t forget – maintenance matters. Book your follow-up trim appointment before you even leave the salon so you never let your layers grow out too long.
Your action plan:
- Identify your hair type and face shape using this guide
- Choose 3-5 layered styles that work for your features
- Save reference photos from multiple angles
- Book a consultation with a stylist who specializes in layered cuts
- Use the communication tips to clearly explain what you want
- Invest in the right products and tools for your specific layer type
- Set up a maintenance schedule and stick to it.